I had to replace my fuel pump last week which means I had to remove the fuel tank. My truck died in a parking lot (better than on the side of the road).
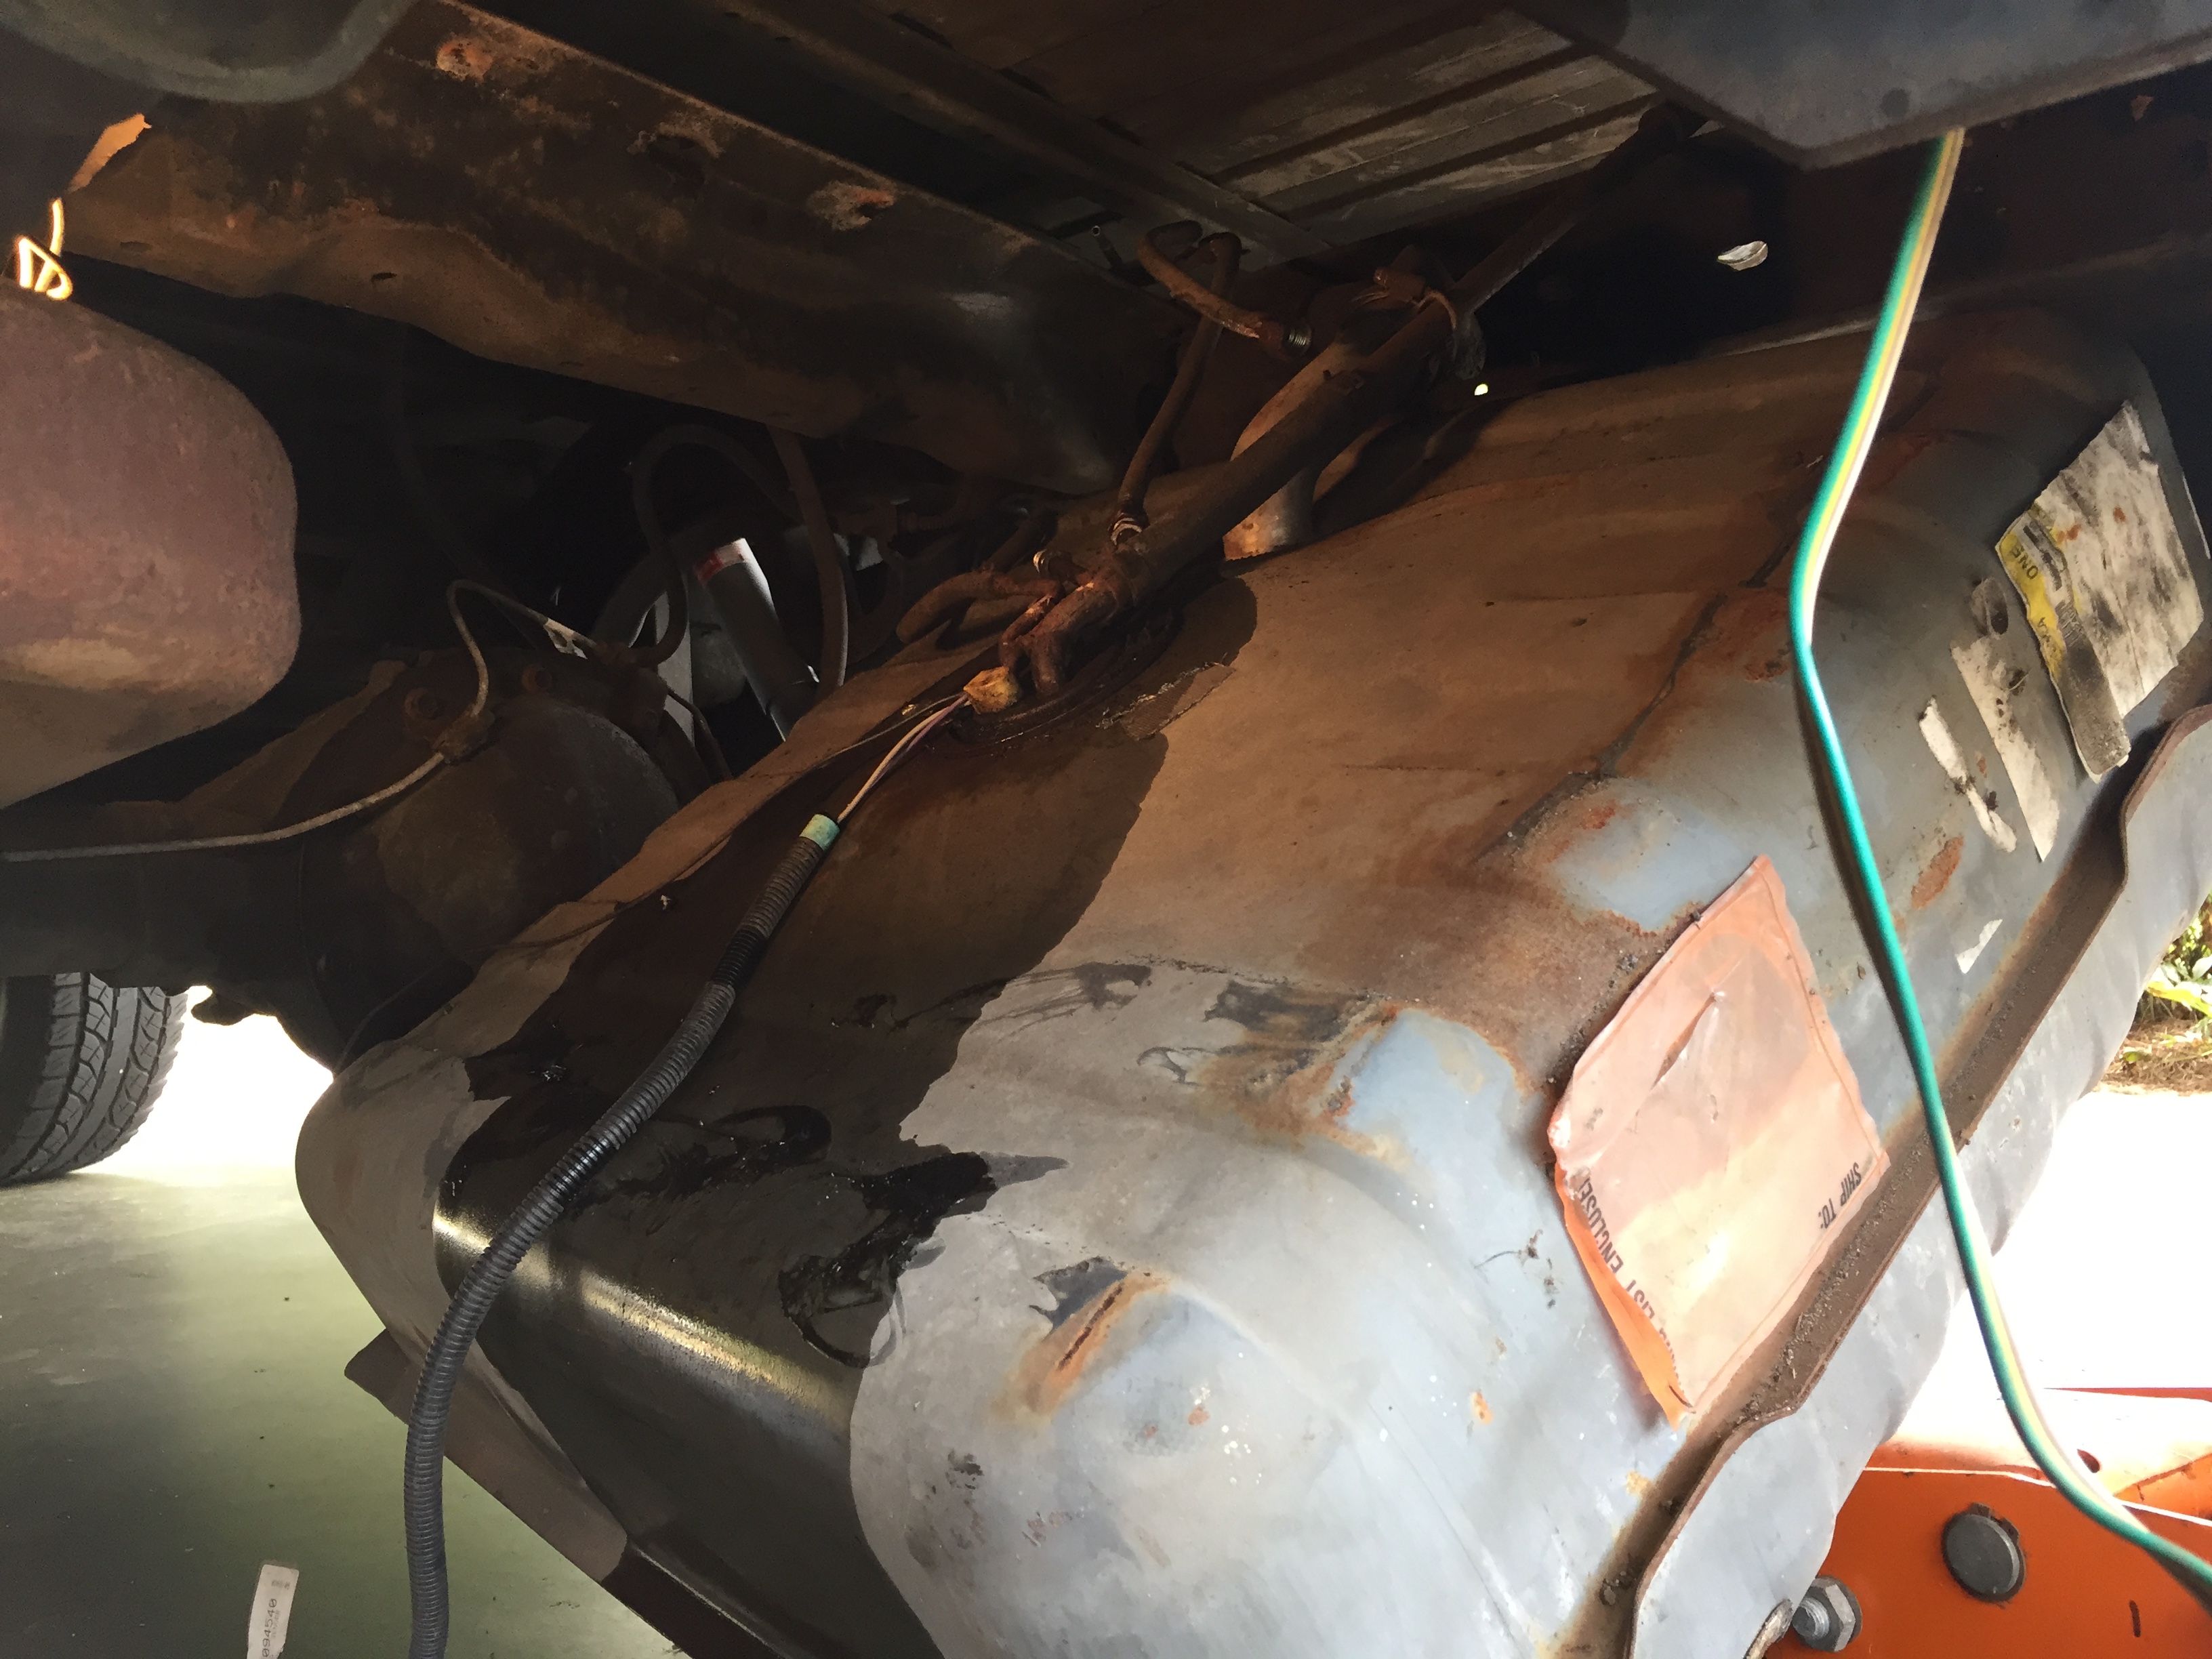
Using a test light I was able to determine that power was coming out of the fuel pump relay (mounted to the firewall passenger side, grayish wire if I recall correctly) and making it all the way back to the connector at the fuel pump. This connector is located, at least on my truck, on the inside of the frame, driver’s side, over the rear axle. The pigtail from the fuel pump to the connector seemed OK, so that left the fuel pump itself.
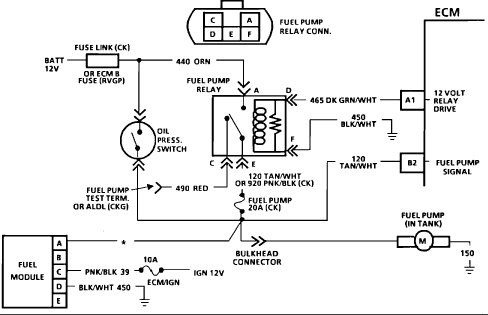
There’s a short red test lead on the fuel pump relay connector. Apply 12v to this connector and then test for voltage at the fuel pump.
If you’re not getting voltage out of the relay, or at the fuel pump, then you need to follow some trouble shooting procedures to determine where the problem is located:
- It could be a bad relay
- It could be a bad or corroded ground connection at the fuel pump
- It could be not getting voltage from the feed from the starter motor (orange wire at relay if I recall correctly, note that in electrical diagram below, it says “battery” but it comes from the battery via the starter motor)
- It could be the oil pressure switch:
- Note that, depending on year model I think, there is an oil pressure switch for turning off the fuel pump if no oil pressure, and an oil pressure sending unit for the oil pressure gauge. The oil pressure switch is located towards the top of the block near the distributor (this is the one we’re concerned with now), and the oil pressure sending unit is near the oil filter.
- Even if it’s the oil pressure switch, you should see voltage at the fuel pump for 2 seconds after turning on the ignition. If no oil pressure (or switch is bad), you will not get voltage after that.
- It could be a computer issue, etc.
Dropping the fuel tank is a huge pain but you can do it yourself. It helps if you have a helper.
I had my Blazer towed to my house and got to work.
Gas Fumes Can Explode, so Be Cautious!
The bulleted list of Removing the Fuel/Gas Tank:
- Remove fuel from gas tank (mine was pretty much empty)
- Loosen clamps at fuel filler tube (big tube and little breather tube) and loosen rubber tubing
- Loosen clamps from breather tube coming out from top of tank (get under vehicle at axle facing rear of vehicle)
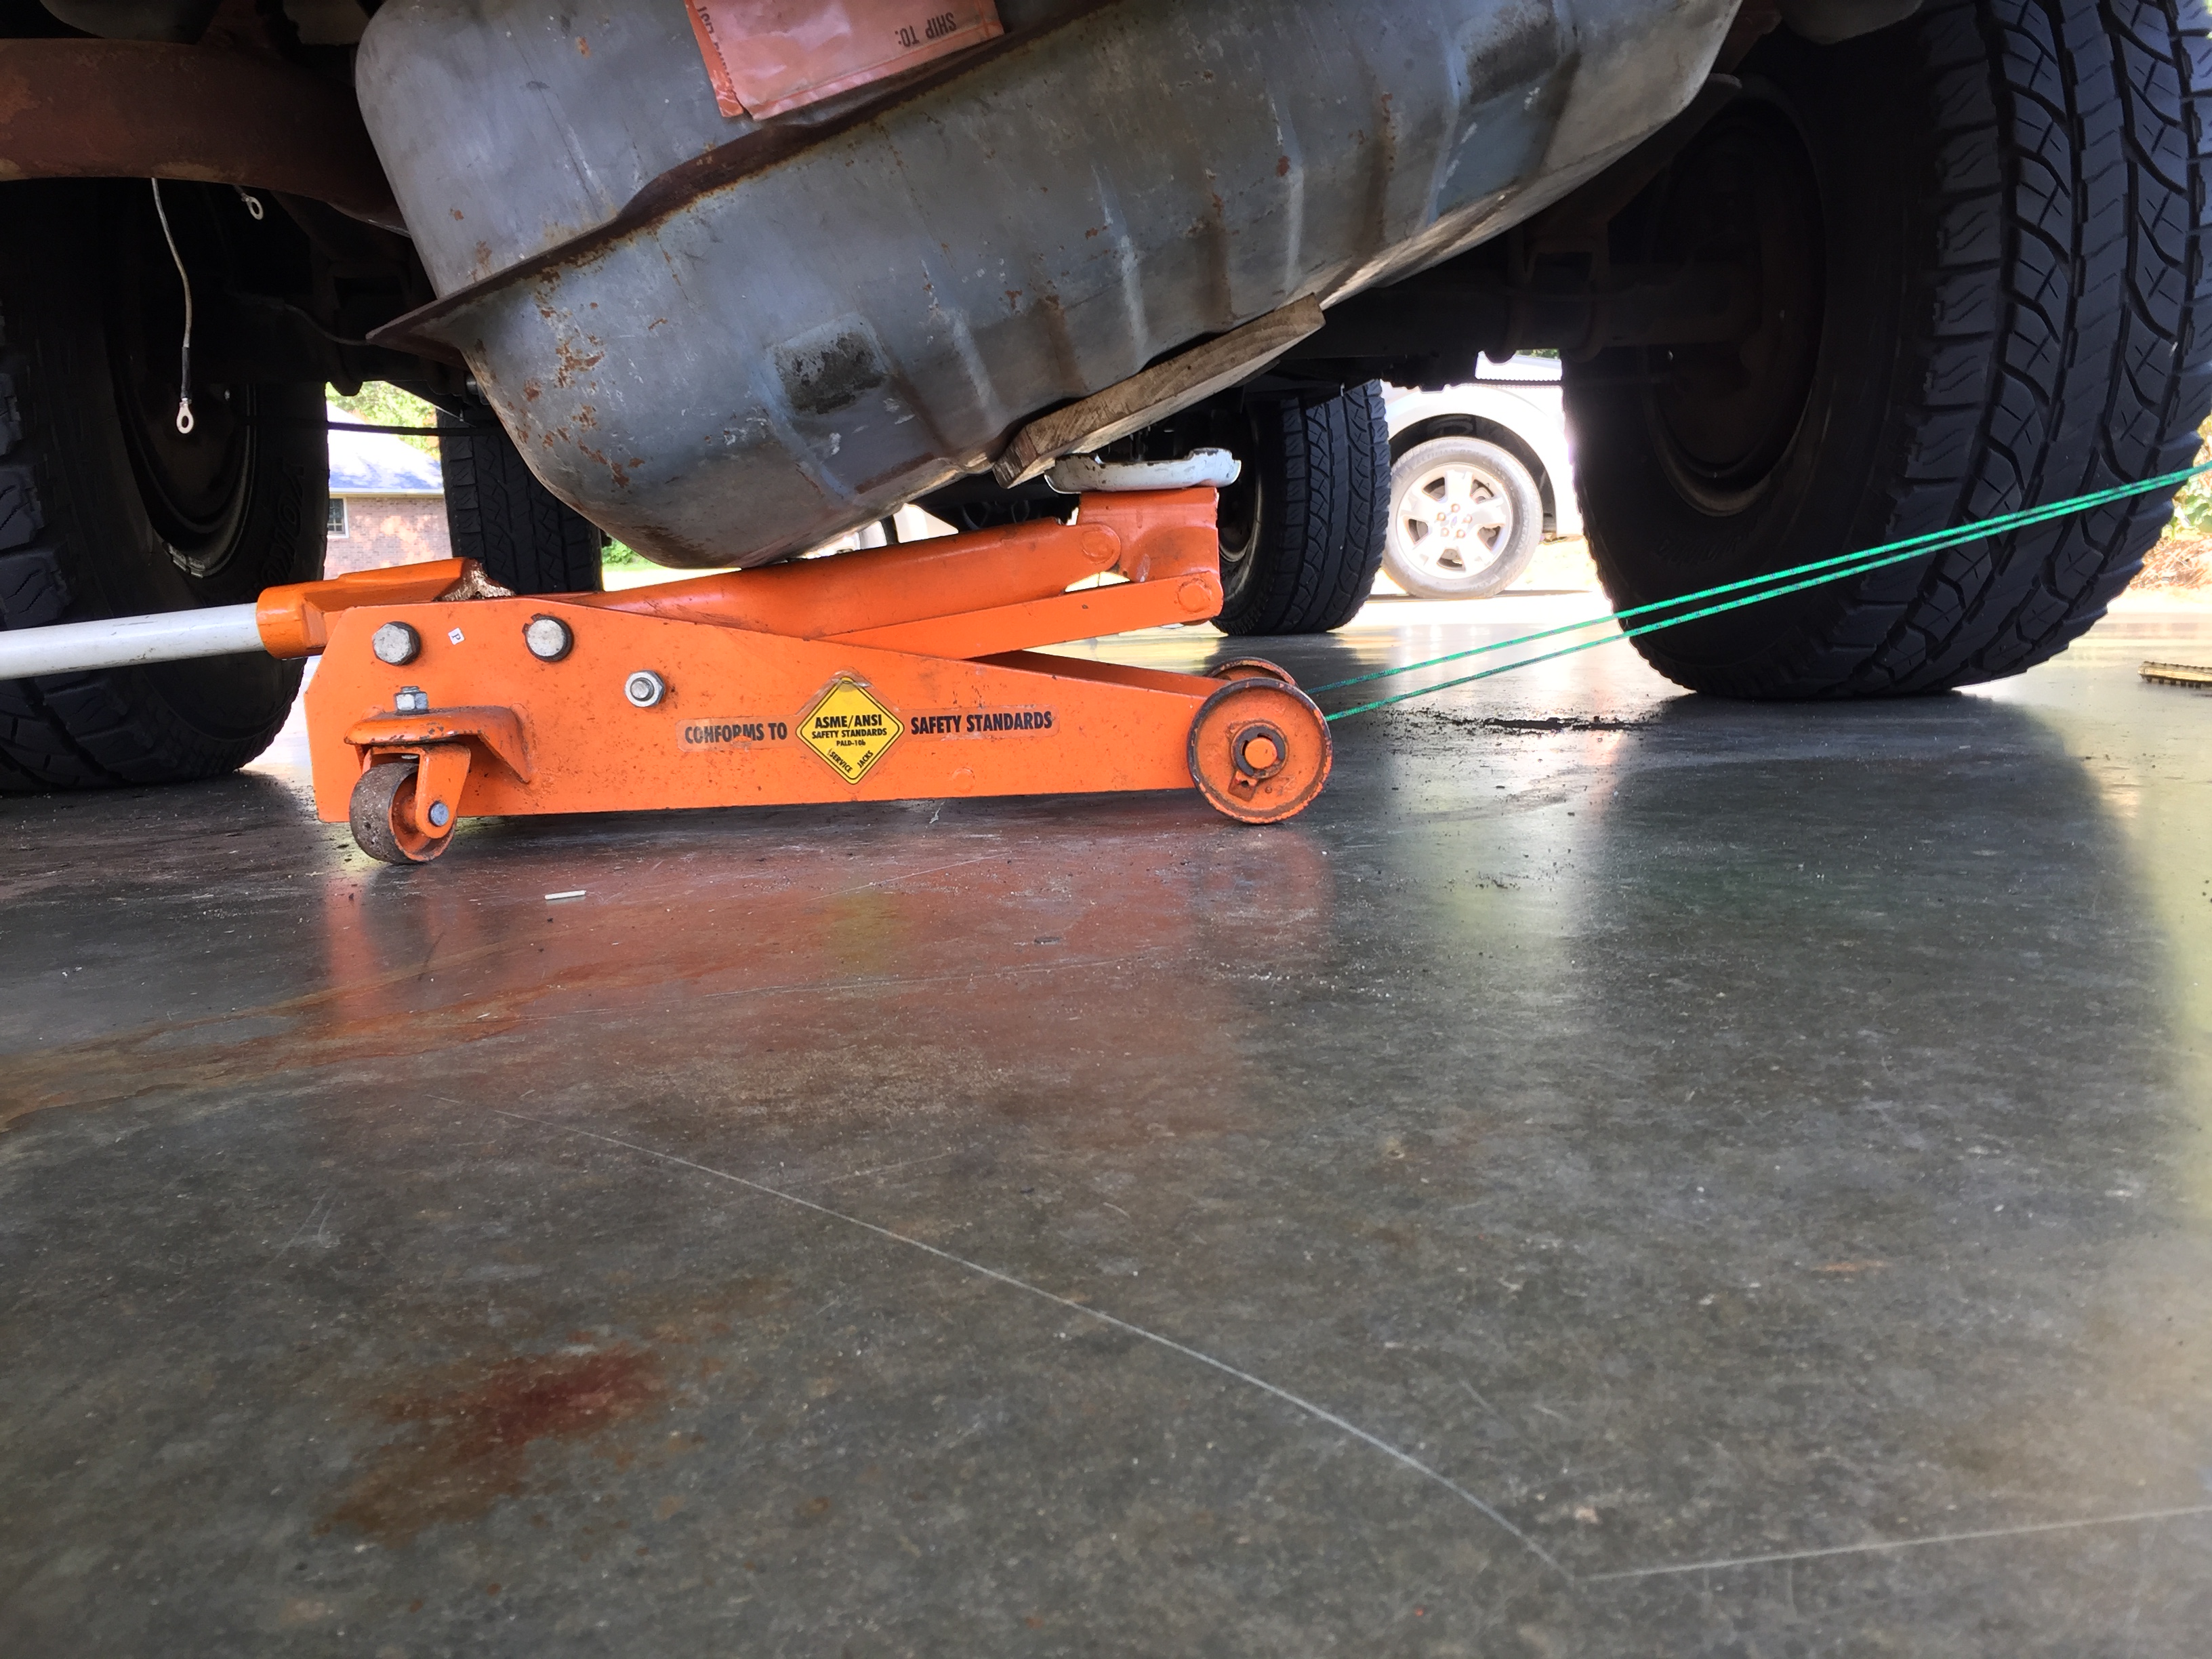
- Position floor jack under tank to support it (it’s a good idea to use a thin wooden board as a cushion)
- My truck does not have a fuel tank skid plate, but if yours does, obviously remove it
- Open tailgate and remove bolts holding tank straps
- Close tailgate
- Remove tank straps from vehicle
- Lower jack some while also working filler tube and breather tube hoses loose from filler inlet
- Lower the driver’s side of the tank while letting the filler tube hold up the passenger’s side where it goes over the frame
- Lower the driver’s side as much as you can
- Spray some penetrating lubricant on the fuel line connectors and let that sit for a while
- If you haven’t already, disconnect the electrical connector for the fuel pump over the rear axle area and the ground connector at the frame
- You can now work your way into a position so that you can get one hand on the fuel line connectors (2) that need to be loosened with a wrench
- You will need both a line/tubing wrench for the fuel pump side and a regular wrench for the larger line side of the connectors
- You can position the wrenches in such a fashion that you can squeeze them together with one hand to loosen the connectors
- Once they’re loose you should be able to use your fingers to unscrew them the rest of the way
- Make sure all the lines, hoses, and connectors are disconnected.
- You should now be able to lower the tank all the way and pull it out towards the driver’s side
Now that the tank is out, clean off the top and blow off with compressed air or a brush.
Gas Fumes Can Explode, so Be Cautious!
You can remove the fuel pump from the tank by tapping the ring with with a screw driver and working it around until it’s loose. There is a special tool for this, but I just used a screw driver.
If your tank is not quite empty, pour the remaining fuel out into a suitable container (even if it’s only a couple of gallons, having fuel in the tank sloshing around makes it harder to reinstall the tank).
You can now replace the fuel pump and in tank filter (most call this a sock).
If your fuel gauge sending unit is not working, then this is the time to replace that too.
Reassemble the fuel pump into the tank and tap the locking ring back into place.
Bulleted List for Installing the Fuel/Gas Tank:
- Position tank under rear of vehicle
- Put drivers side of tank on lowered floor jack
- Lift passenger’s side of tank and position filler tubes over frame
- Work tank up as close to passengers side frame as possible (this is where a helper comes in handy, otherwise you’ll need to get creative – note cord in photos holding jack from rolling)
- Once tank is as high up as you can get it you can start to raise floor jack, while keeping tank in place (again a helper is needed or tie it and keep tightening it like I did)
- The goal here it to get the tank to a position where you can get the fuel line connectors close enough to screw together, yet low enough to be able to reach (not easy)
- The hard part is getting the fuel lines threaded with one hand. This takes patience. I kept bending the braided hoses to get the angles correct and finally got them threaded.
- Hand tighten as best you can, then position the two wrenches so that you can squeeze them together with one hand to tighten (again not easy).
- Reconnect the other tubing coming from the fuel tank (breather line), don’t wait until you bolt up the tank like I did and pinch it between the tank and cross-member support
- Reconnect the fuel pump electrical connector and ground connector
- Now start working the tank up into position by raising the floor jack and also working the filler tube and breather tube into place
- Keep an eye on overall fuel tank positioning to make sure you’re not crushing or mashing anything
- Once tank is back into position, open tailgate and replace tank straps
- Make sure you have them correctly positioned
- Make sure you have cushion material in place on straps
- If you have skid plate, reinstall it
It’s a good idea to replace the fuel filter at this time if you have not done so recently (on mine it’s on the inside of the frame under the passenger side door area).
Hopefully this will help you avoid some frustration! I had read several posts/threads stating that you need to remove the trailer hitch and even the rear bumper to do this – you don’t (maybe in some cases, not mine), plus if you remove the trailer hitch you have less things to hit your head and other body parts on!
Fred